
House Renovation: Week 1
Amidst our efforts to unpack, I was finally able to compile all of my photos of our house progress. These are all from our first week in the house — starting September 24th — and it's weird to look back and think this was only a couple weeks ago. We got so far in such a short amount of time, thanks to 12-hour days and having lots of help from our families.
Since we were having our hardwood floors refinished throughout the house, we were on a very tight timeline to get our projects done before the floor guy showed up. It was a crunch, but we accomplished all of our goals (and then some).
Here's everything we accomplished in the first week — I'll follow up with weeks 2 + 3 later, because it was just too much to show all at once. So, let's get to it!

This was the second floor hallway — the linen closet is behind those white doors, the master door is on the left and the guest room is across the hall, on the right. The door in the front right goes to the attic, and the third bedroom (which will be an office) is behind me to the left, at the top of the stairs.


The night we got our keys, we looked around, took some 'before' pictures, and got to work demolishing stuff. This is Jim ripping down the wall in the linen closet, which backed up into the master bedroom closet (below). Meanwhile, I got to work taking down the wallpaper.

The linen closet was very deep, and had some removable wire shelves in it — pretty makeshift. Our plan was to expand the master closet into that space, thus making the linen closet shallower. We also wanted to install some permanent wood shelves and replace the bi-fold door.

This was the master closet. It was actually pretty large, but the small door opening made it very difficult to access the space. This door fit the linen closet space, so we planned to use this door as the door for the linen closet (which would match the other original doors in the hallway) and install large bi-fold doors for this closet. We also removed the carpet so the hardwood floors could be redone. *I also just realized that "tah-tah!" should have been spelled with an 'h' but it's late, and you get the point.

Jim and his dad are cutting open the new door frame...as I stand and chew my nails.

I was a little scared when I saw this plaster disaster (hehe) but they knew what they were doing. Fun fact: did you know they used to mix horse hair in with the plaster in these old homes? It acted as a sort of "mesh" to hold the plaster together. I'm not sure how I like the thought of 90+ year old horse hair in my walls, so I'll just pretend I didn't hear that.

My mom, Jim's mom, and I handled the wallpaper, and it was a bitch. To make matters worse, we found a BONUS layer of wallpaper underneath! Oh joy. So we were at it for an entire day.

Hallway has been sanded, cleaned of old glue, and primed...

Here's the living room — the plaster ceiling had some damaged areas from previous problems that had been fixed, so that was at the top of our list.


These photos make it all look so easy, don't they? ;) Oh, and the walls have been painted! They look a little weird in the bad lighting, but they are Sherwin Williams Agreeable Gray. While the guys handled the construction work, I was on paint-till-I-drop duty. I actually enjoy painting, but this definitely tested me! Thankfully, everyone pitched in so we could stay on track.

Here's more closet progress...

Getting there! We are just waiting on the doors at this point — they were a special order —and we've just added some finishing details. And I am digging this wall color. Majorly. It's Sherwin Williams Gale Force.
That pretty much ends the projects from week one — the other two bedrooms and the hallways got painted but I'll be able to share those in my next post since they were a bit of a mess during all of this. Next up: floor sanding and moving in!
Just Moved!

Shhh...it's been quiet over here!
I just recently moved in our house (that we bought back in JULY!) and things have been very, very crazy. We've done a lot of cosmetic work to the house, so things are still a bit of a mess and we're still living out of boxes. We've made a lot of progress lately, though, so I can't wait to share some photos after things get settled. AND we now have wifi — so I'm back on the grid!
I will have some fun, budget-friendly home decor DIYs to share, as well as before and after shots of our projects.
See you soon!
DIY: Lakewood Subway Sign Art

With so much house preparation work being done, it's hard to even think about what's going on our walls (aside from paint, of course). But since we've pretty much gathered all of the furniture and little touches we can right now, our thoughts have finally drifted towards thinking about art. We got the new Restoration Hardware catalog last week, and as it usually does, it featured these delicious vintage subway signs. Jim has actually been wanting one for a while, so it seemed the perfect time to not just get one, but make a custom one with our new street name on it!
We had the perfect frame, so within a couple hours of me agonizing over street names, typefaces, and kerning behind my laptop, we finally have our own custom print for the living room.

Ragged Row Opening Party


Shore Society has hit Pittsburgh! Brigitte has featured some of my prints in her store (thank you!) in addition to selling some of her own prints and cards (the chevron watercolor and the cards mixed with mine are her designs). She and her boyfriend Dave have also designed some PA-pride prints and silkscreened t-shirts with the designs. They look awesome.

We had a great time at the party and I wish I could have bought everything. She's carrying quite a range of styles and brands for fall — my favorites have to be the snakeskin leggings she had, and a Milly wool triangle skirt. She also carries some of my favorite jewelry lines — Gorjana, House of Harlow, and low luv x erin wasson. If you live in the 'burgh or are wanting to take a road trip, definitely stop in and check it out. Sewickley is such a cute neighborhood (Clevelanders, think Chagrin Falls but bigger) and I wish we could have explored a bit more. Next time!
Recipe: Salty Peanut Butter Chocolate Cookies


These cookies actually taste better once they have cooled, you can really get the sweet/salty combo when they're not so warm. Enjoy – and good luck stopping at just one.
Lake Erie Love tanks

A few weeks ago, I worked with a group here at American Greetings to produce my "Lake Erie Love" prints into some cute tanks for summertime.
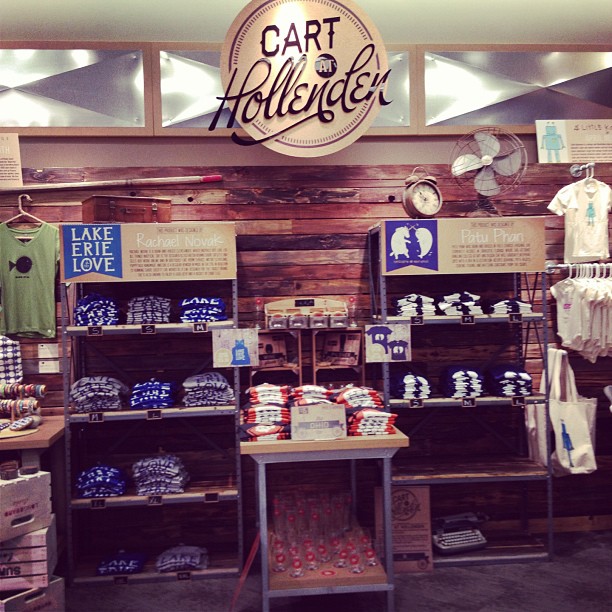


They came out great and I love the little anchor on the back. There is still plenty of summer left, so you can head over here to check them out. I'll definitely be wearing mine on our next boating trip!
DIY: Créme de la Créme Sweatshirt

When I first spotted this Zoe Karssen sweatshirt on Blair of Atlantic-Pacific, I was totally in love — clean type, a fun phrase, all on a cozy pullover? That's a recipe for the perfect weekend piece for fall. As with most things Blair wears, the sweatshirt was sold out—and even if it wasn't, I don't think I could have convinced myself to spend $160 on a pullover (and I can justify pretty much anything)!
Luckily, Dale of SavvySpice posted this awesome DIY to emulate the sweatshirt, so you can get the look and save some serious coin. You can head over there for the full DIY, but here's the jist of it.
I got a gray pullover from H&M for $9.99 (it was actually men's) and a few packs of iron-on flocked letters from Michael's. If you are trying this DIY, definitely head to a Michael's store—I was unable to find any iron-on letters in this font online, and the type here is key to recreating the look (obviously).

Here's my crappy iPhone shot of the process. Cut out the letters you need and arrange them on the sweatshirt. I cut my letters into their actual shapes rather than in rectangles so I could be sure they sat on the same baseline, and so I could space them out perfectly (that's what being a designer will do to you).
Place a cotton press cloth over the letters and iron per the package directions. Let cool, then peel the plastic backer off, and you're all set.
It's not exactly the same, but it's still pretty close. And the whole thing cost me $26. Score!

Shades: Karen Walker | Sweatshirt: DIY | Pants: J Crew (old) | Wedges: Steve Madden | Bag, watch: Michael Kors

WMC Fest talk video
My talk from this year's WMC Fest was recorded, and is now uploaded for those of you who might have missed it. Or for me to watch and cringe ;) You can follow along with my slides in PDF form since you can't see them in the video, there's a link in the video description. You can also see all of the other awesome talks on WMC Fest's YouTube channel. I can't believe this was already two months ago, I had such a blast and watching the talks totally takes me back.
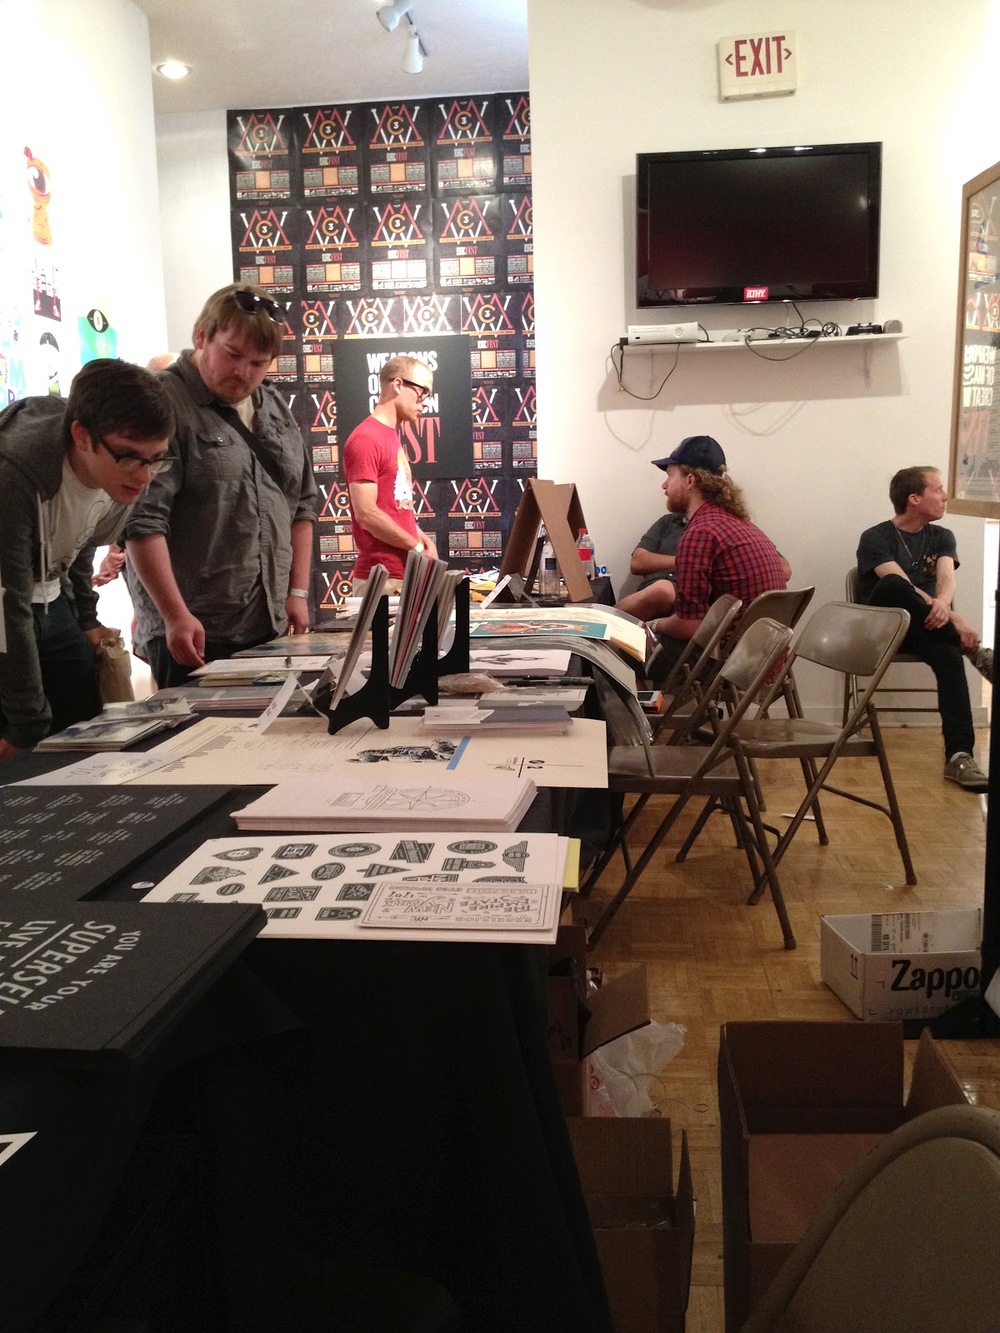
WMC Fest 2012 Wrap-up

I wish I saw enough talks to give a play-by-play of the speakers like I did last year, but with working a table both days, it was very tough to be in two places at once. However, I can at least share a bit about my experience and what it was like to be on the other side of the fest. If you're looking for some great write-ups, check out here, here and here (you will also be able to see the true fluorescence of my pants somewhere in there).

This was my first time speaking {ever} and I had so much fun. I can't wait to do it again. The first time is always the hardest - but the ice has been broken! My talk was called Side Hustle, and was aimed at encouraging young designers to continue working for themselves even after getting a steady 9-to-5. It's so vital to remain relevant outside of your job, and I gave some tips about how to make this process less overwhelming.

After the talk I made a beeline for the Happy Dog to get some food (and a big, cold beer! woo!) and then we checked out some of the bands at Saigon Plaza. You can tell I'm pretty relieved at this point ;)

I had a vendor table set up in the iLTHY Workshop gallery both Saturday and Sunday, and we had a great little crew. It was a tight space behind the tables so we all got reeeeal familiar with each other (occasional ass bumps will do that).


The fest was amazing as always, and it was incredible to see the amount of people who came out this weekend – WMC is definitely growing and gaining some serious momentum. It's just proof that there's such great strength and energy in the creative community, and that "if you build it, they will come." So if that doesn't give you a swift kick in the ass to get your latest project off the ground, I don't know what will. There isn't anything we can't accomplish with our passion, networks, and relentless hard work.
Big thanks to all my friends and family who came out to help, support, be there, etc. You guys are THE BEST. And thank you to Dean for taking these photos – I pretty much blinked and the weekend was over, and had barely any pics to show for it.
So did you guys attend WMC? Who was your favorite speaker or band – and what did you love about the weekend?